A simple project using PVC solvent weld sewer pipe and fittings to construct a rack for storing kayaks and canoes. Pipe dimensions are easily modified to allow for a wider, narrower, or taller rack. To add more stability against high winds, the hollow legs can be filled with sand or rocks or sunk into the ground.
View PDF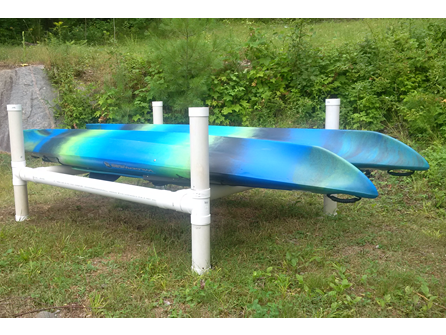
This project was made with 4" sewer pipe and fittings but could be completed using 3".
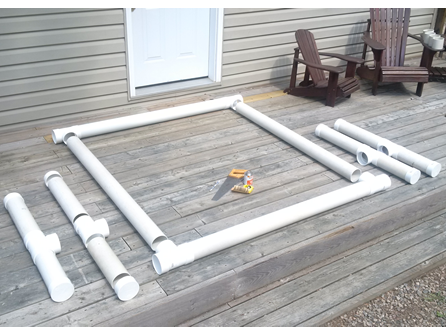
You will need the following sections and sizes (see photo):
Ideally, work on a flat smooth surface such as a deck or driveway etc.
Assemble all 4 pipe lengths of the main frame as shown in photo "Kayak holder parts" using the Tees but not cementing yet. Don't push the parts too far together as you will have to take them apart for cementing. This "trial fit" allows you to make sure the frame is square and oriented correctly.
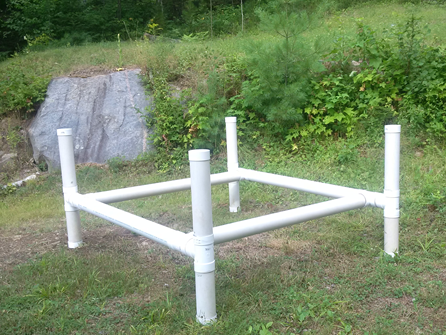
Next, assemble the legs as shown in the photo "Kayak holder frame" noting that the longer (20") pipes are used in the upper part of the legs. Use the Tees to join the pieces but don't cement them yet.
Use the 3" pieces of pipe to join the 2 Tees at each corner of the frame but don't push them together all the way.
Once you are satisfied the frame is square and correctly aligned, make alignment marks on the fittings and pipe so when you cement the pieces together, the frame will remain square.
Time to cement !
Be sure to do your cementing in a well ventilated area.
Lay out the pieces as shown in the photo
Start by cementing the legs to get a feel of working with solvent cement.
Apply PVC cement to the pipe and socket end of the fitting and working quickly, make a 1/8 turn of the pipe inside the fitting ensuring that the alignment marks line up.
NOTE - PVC cement sets almost immediately so you will have to work quickly to ensure you line up the alignment marks on the pipe and fittings before the cement sets.
Continue solvent cementing all pipe and fittings.
NOTE - when cementing the legs to the main frame, use the 3" pieces of pipe to connect the two Tees.
NOTE - you may choose to not cement the caps onto the legs. This allows you the option of filling the legs with weight to add additional stability to the finished frame.