This is a fun summertime sprinkler setup using 3/4" PVC Schedule 40 pipe and fittings. When attached to a garden hose, it provides a welcome relief from summer heat for kids and pets. A great project to get the whole family involved in an outdoor activity. Total build time is about 1 hour.
View PDF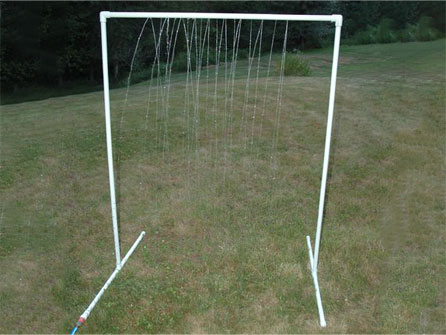

This project called Kidwash was designed by discontinuity
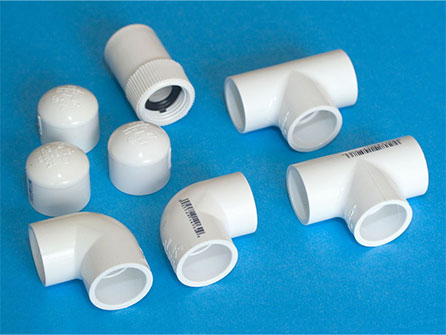
You will need the following sections and sizes (photo 1):
Be sure to do your cementing in a well ventilated area.
Lay your pieces out and get your PVC Cement ready. The cement dries fast so you'll want to just do one piece at a time.
Once you have all the pieces ready to cement, dry fit all the pieces to make sure they are lined up properly and square. Make a mark on the fitting and pipe wherever they are to join to make sure they will remain aligned once cementing begins. PVC solvent cement sets almost immediately so careful alignment is important.
Start with the feet. Take one of the 18" sections and an end cap. Daub some cement inside the lip of the end cap and around the outside edge of the pipe and attach the cap - photo (2).
Repeat this 2 more times for 2 more of the 18" pieces. On the 4th one, attach the threaded hose attachment piece.
Now connect the pieces you just cemented using the Tees.
When you're done, you should have 2 pieces as in the photo (3).
Next, cement the two 5' sections to the feet you just made.
After that, add the elbows at the top. Be sure the mouths of the elbows are pointing perpendicular to the direction that the feet are running. See photo (4) for details.
For the holes along the top 4’ pipe, you can start out with a 1/16” drill bit but you may want a larger stream so in that case use a 3/32" bit.
Take your 4' section of PVC and drill some holes in a fun pattern that will spray water in the air. Decide on how you want the water to come out – straight row of holes along the bottom, double row etc. Mark with a pencil and drill accordingly.
You may want to experiment and see what works best. You can do this by not cementing this final piece in and if you don't like it, buy some more PVC and try again. Once satisfied, cement this last piece in and you're done. Instructions on the cement can will indicate how long to wait before using your project.
